Saturday, October 26, 2013

Romeo and Juliet

     Every once in a while I get a commission that is a real challenge and at the same time wonderful to work on.  I loved doing the research for this pair of dancers.

Tuesday, October 8, 2013

Dragon's Dream Part 4: Finished

The finished dragon and rocks were painted with a couple of thin washes of acrylic paint.  I added some landscaping touches, moss made of model railroad grass and ferns made from laser cut paper.


The back view shows the tree made of twisted wire, solder and Sculpy clay inserted in the tube sculpted into the form of the dragon.

This little imp was made by 

Todd Krueger.
The old hag is my creation.  She's holding a wonderful dragon book made by Ericka VanHorn.

Sunday, September 15, 2013

Dragon's Dream Part 3: Creating the Dragon

    Creating the form of the Dragon over the shape of the interior cave was really just a matter of cutting and carving pieces of Styrofoam and attaching them to the inverted bowl shape with tacky glue and toothpicks. 
    Then I started adding Paperclay to the surface to cover the Styrofoam, just about six square inches at a time.  I rolled the clay out on waxed paper, painted Tacky glue on the area to be covered and applied the clay to it. As the Paperclay began to firm up I applied texture with stiff brushes and any other tool that would create the effect I wanted.

    As the clay dries it shrinks and cracks. There was a fair amount of crack filling to be done each morning before moving ahead with the sculpture. I wet the crack and the area around it before filling it with more Paperclay.
   A small tube was fitted into the back of the piece between the dragon's body and wing. This was to hold up a wire tree.  The area at the lower left that appears to be missing a rock is where the battery for the candle's light goes. 
I'm still not sure if I liked the dragon unpainted or painted best.

Thursday, August 29, 2013

Dragon's Dream Part 2: constructing the cave

To construct the cave interior I used inch thick Styrofoam to make a bowl shape. Pieces of Styrofoam were attached with Tacky glue and held together with tooth picks. The interior was covered in a thin layer of paper clay .

I decorated the back wall with a mandala with a dragon motif in the center.  Instead of adding paper clay on top of the dragon design I used a flat headed tool to push the paper clay back to shape the dragon relief and the letters.

 The base of the piece was a 12 by 14 sheet of one inch thick Styrofoam.

In the center of the cave is a stone table dressed by Todd Krueger with a scull, a candle and other useful items. It was attached to the base and surrounded by a floor of paper clay before the the cave was set in place.


This is a view of the interior through the cave door. A root growing through the roof of the cave hangs down behind the table.  Leaves have blown into the cave to litter the floor.                                                

Thursday, August 22, 2013

Dragon's Dream Part 1: clay mock-up

For several years now I've had an inspiration to make a cave with a dragon sleeping on top.  This past winter I started working on it and this and the next few postings will show the steps to the finished piece.


My first problem was how to design a sculpture with a hollow center.  So I turned a plastic bowl upside down and sculpted a mock-up of the piece around it using smooth water base clay. 

This sculpture is the actual size of the finished piece. I used a ruler and calipers to measure the figure and creat the shape in Styrofoam and paper clay.  

Tuesday, July 16, 2013

Santa in over-alls

Hello.  I've been very busy over the winter and spring.  I'd like to start sharing some of what I've been making.


   This Santa was commissioned by a woman who wanted a mountain Santa in his work clothes.  I loved her ideas and created this Santa for her.  
   Making a pattern for the over-alls was a real challenge but the toughest part of all was the top stitching.  He is only 6 inches high and it all had to be done by hand.  It took a week to finish.  
   The boots are leather glued to his feet with Tacky glue.  I painted them with a wash of acrylic paint to make them look worn.

Saturday, February 2, 2013

Miniature Christmas Village

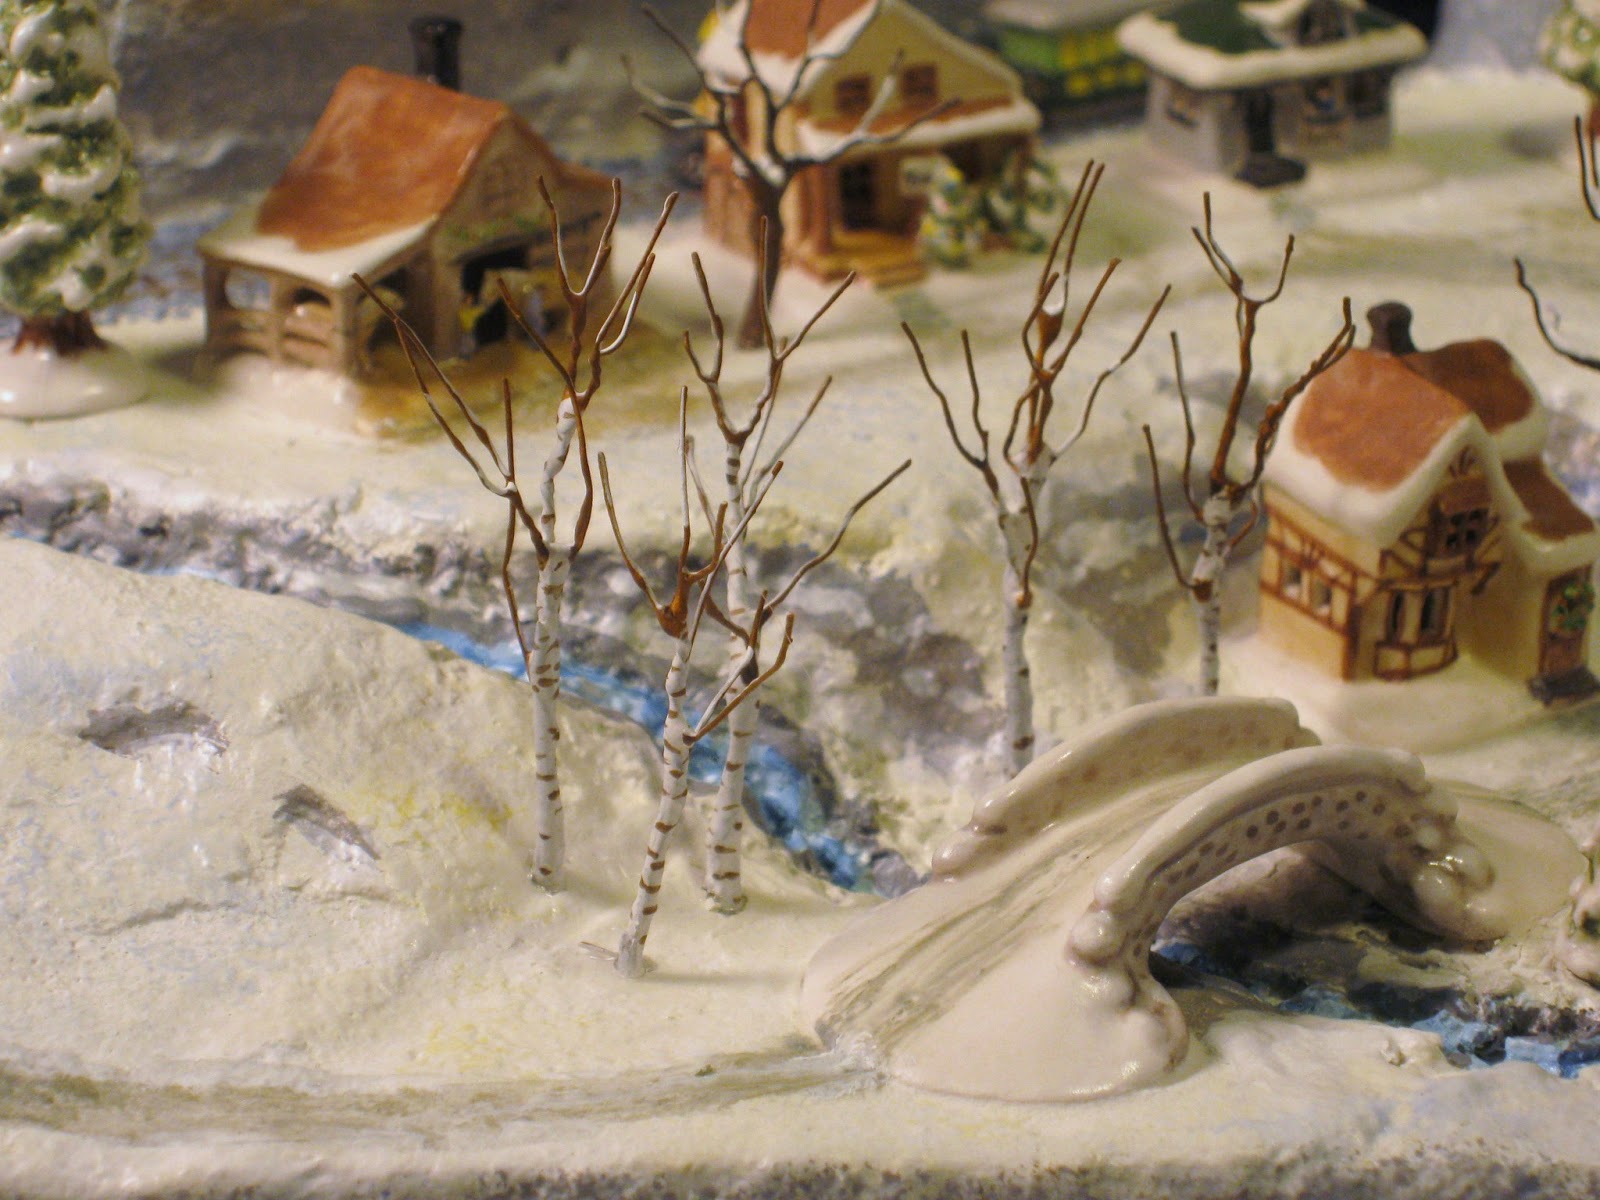
In the past I have used tiny twigs for trees. This time I wanted trees that wouldn't break.  These birch trees are made of twisted wire.  After twisting the wire was soldered and painted.  They are about 1 1/2 inches high.

Sunday, January 27, 2013

Creating a Miniature Christmas Village

I had an opportunity to design and construct a miniature Christmas village with 34 lighted buildings.  It was to be visible from both sides.  How to design it?  I took ten pounds of clay I'd set aside for sculpting, made a big lump out of it and started working out the landscape.
.
The finished landscape is carved from Styrofoam, covered in spackling compound (used for filling small holes in walls) and painted with acrylic paints.  I'll re-use the clay for the next design project.

Monday, December 31, 2012

Vermeer: Lady trying on pearls


       Vermeer is one of my favorite artists.  I had an opportunity to make a doll after a woman in one of his paintings .  It was great fun and quite a challenge to get the color of her coat right.  I had to dye the fabric several times to get the exact shade and brilliance of color.  
     The "fur"  is silk velvet dampened and ironed flat.  The "ermine tails" were created using a Sharpie permanent marker to mark the silk fibers.

                               Happy New Year!

Tuesday, November 20, 2012

Red and the Wolf finished


This beautiful bed carved by Nicole Marble and dressed by Judee Williamson was made for Red and the Wolf. It was shown and sold at Tom Bishop's Chicago International Miniature Show.  If you haven't been to this show try to get there.  It's the best show in the US.

Friday, November 16, 2012

Red and the Wolf

  Red and the Wolf were made to go with a bed made by Judee  Williamson and Nicole Marble. I made the Wolf like a doll with shoulder plate head, paw arms and paw legs on a wire armature with cloth body.  The tail was a piece of stiff wire with squirrel fur folded over it.  They were great fun to make.

Reds shoes are red leather and her cape is wool.  The wolf's nightie and cap were made from an old hanky.

Wednesday, October 10, 2012

Going Visitiing

Jean and her canaries are going visiting, perhaps to see her daughter or son.  The carpet bag is by Sylvia Rountree, The Dolls Cobbler. The birdcage is from Bespack.


Monday, September 3, 2012

New Haunted Village

I'm off to the Denver Show this week with my new fun creation, a Haunted Village.  I've spent most of the summer designing and making the houses.  They are one inch high or less and can be lit up like the Christmas Village.  I guess making the witches got me to thinking about Halloween.  

Friday, July 6, 2012

Castle Room: more details

I thought you might like to see a close-up of some of the details in the Castle Room.  The dwarf and the table design are by Todd Krueger.  The table is by David Krupick and the books and metal sculpture are by Erika Van Horn.